Setting Up Hosting #
Tailfin provides hosting and builds WordPress websites though our Flywheel account. Some clients may provide their own hosting – in this case, skip straight to Installing Divi. Flywheel has several in-depth help articles for more specific information, and their troubleshooting team is responsive to support tickets. All WordPress sites hosted by Tailfin should be added to Flywheel in the same way. After logging in, click the Create a New Site button on the dashboard.
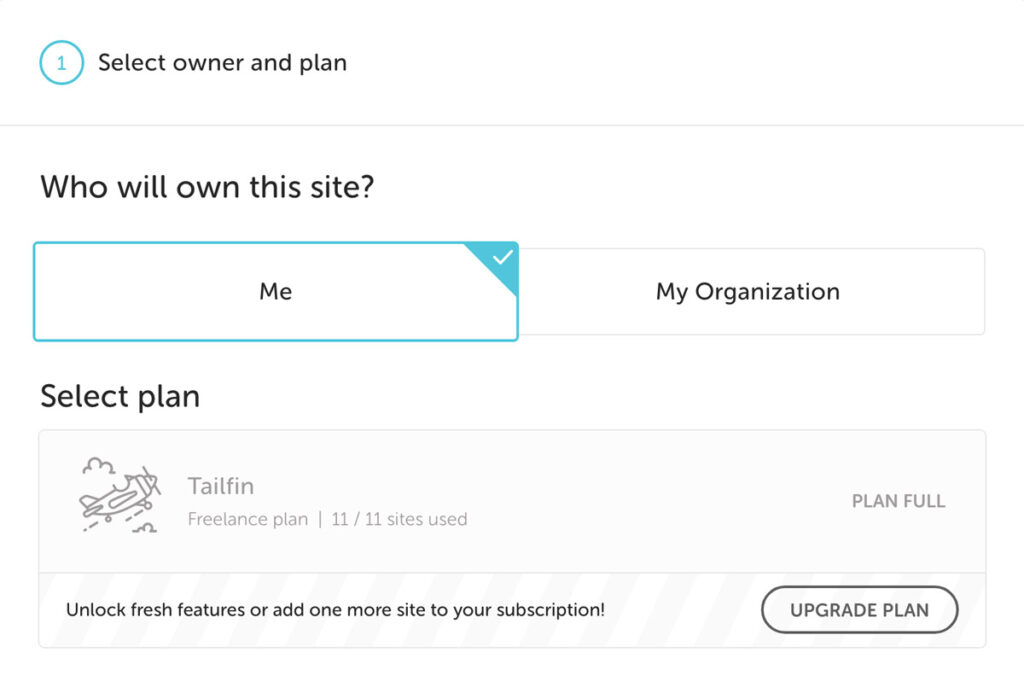
Step 1: Select owner and plan
Keep these settings the default and add a new site managed by Me under the Freelance Plan. You may need to upgrade the plan if all seats are full – discuss with your account manager before upgrading or adding new fees to the account.
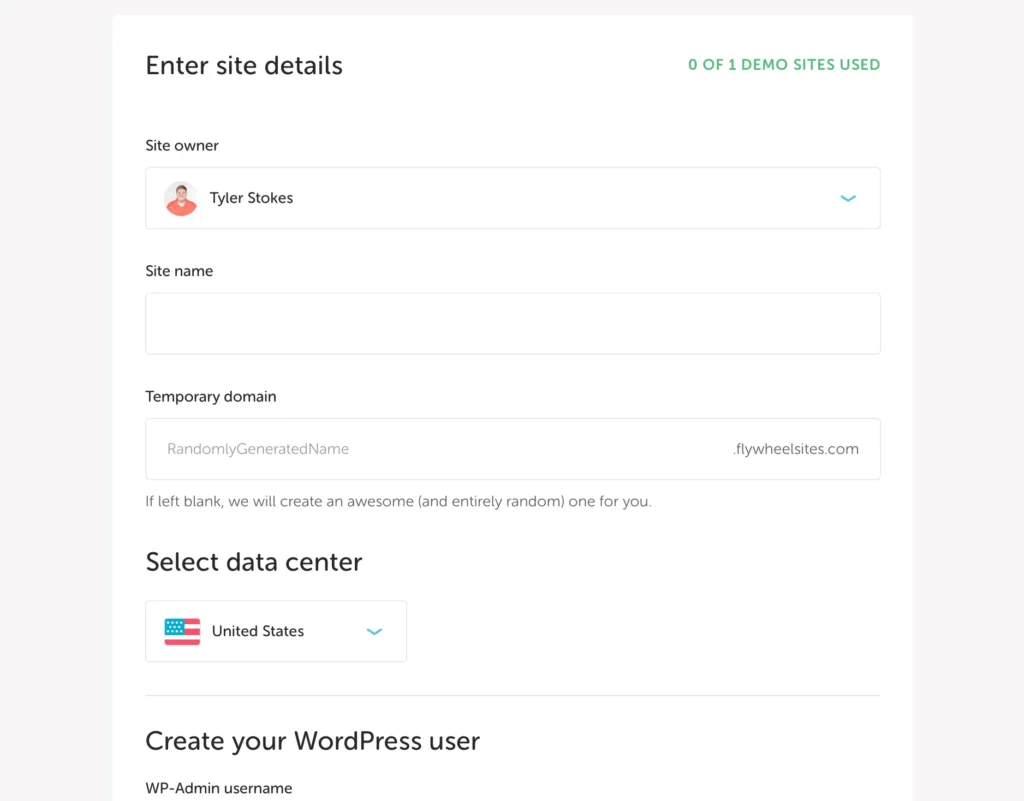
Step 2: Setup WordPress
Fill out the startup form. The site name will carry across to WordPress as your primary name, though it can be changed later. The temporary domain will be used for staging only, and the wp-admin username will be used to create a primary admin login. After it’s created, sites can be logged into through WordPress without needing to access Flywheel. This login should only be shared internally, and a separate admin login should be created later for the client.
Step 3: Click the Create Site button
Creating the site and installing WordPress will take a few minutes. You’ll get a notification on the dashboard when setup is complete, and an email will be sent to . At this point, the site is in staging and can be worked on in WordPress.
Acquiring a Domain Name #
Flywheel provides hosting, but does not include domain name registration. Tailfin can offer to procure one, while some clients may already have a domain name registered. Either way, the domain will need settings changed to point the URL to Flywheel hosting before the site can go live. It’s recommended to do this step first/as early as possible, as it will take 24-48 hours for settings to take effect.
The only time you want to wait to change DNS setting is if the staging site is completely replacing an existing non-Flywheel hosted site. In that circumstance, DNS settings will need to be changed last. This means there will be down time as the URL is migrated from the old hosting to new hosting – be prepared for this down time.
Tailfin-Managed Domain Names #
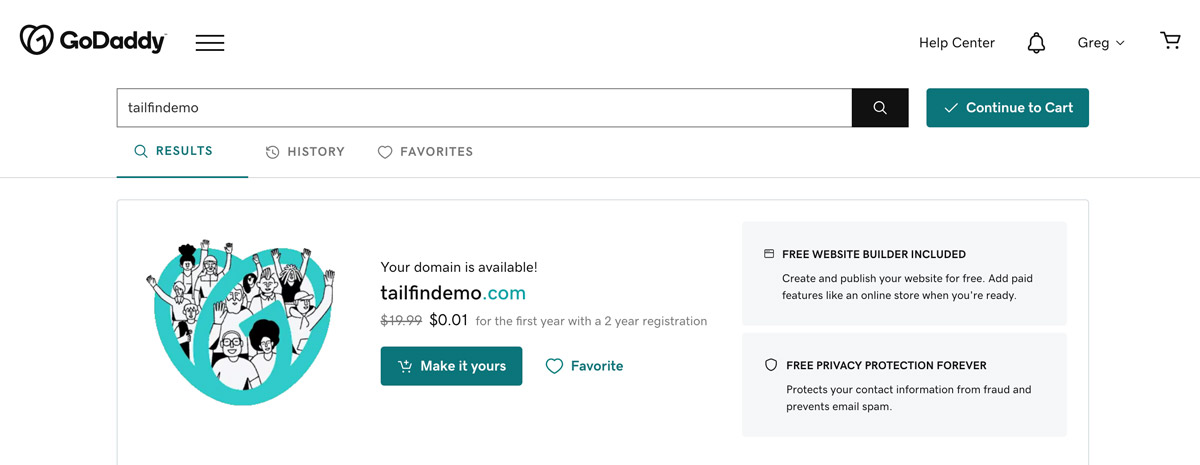
New domain names should never be chosen by the designer, but should be a prior discussion with the team and the client to find one available and discuss cost/length of registration. Once the domain is chosen, Tailfin needs to purchase it and choose length of registration with our GoDaddy account.
Client-Owned Domain Names
Client-hosted websites will commonly use accounts like GoDaddy, Bluehost, Squarespace, etc. The easiest way is to manage DNS settings is to ask the client for their provider’s login information. Whether it’s done client-side or by Tailfin, the setup information will be the same across providers.
After a domain name is purchased and settings are able to be accessed, setup proceeds the same way.
Point the URL to Flywheel #
Once a domain name is purchased and settings are able to be accessed, setup proceeds the same way whether managed by Tailfin or by client.
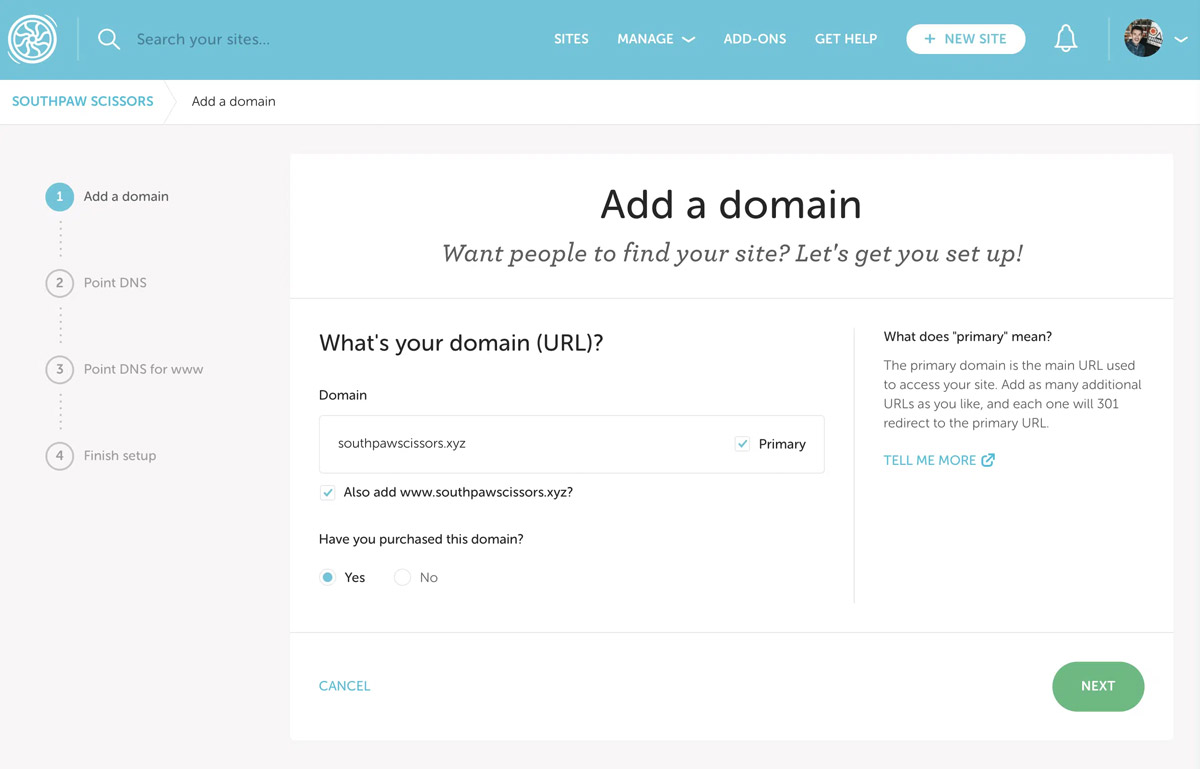
Step 1: Add your domain to Flywheel
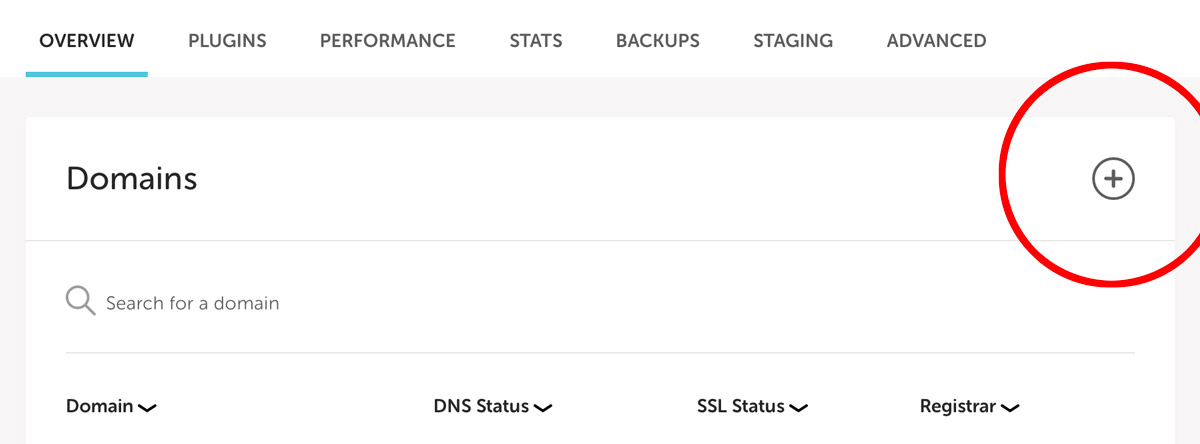
Select your site from the Flywheel dashboard. Under the Overview tab, click the + icon in Domains.
Fill out the domain information and click next.
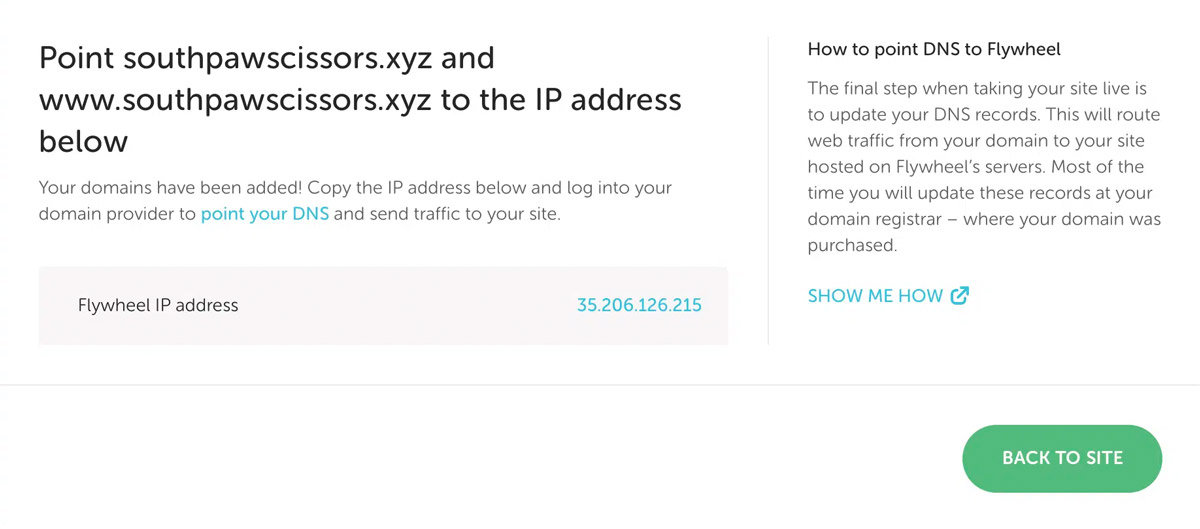
Copy the Flywheel IP address for the next step.
Step 2: Point the DNS to Flywheel
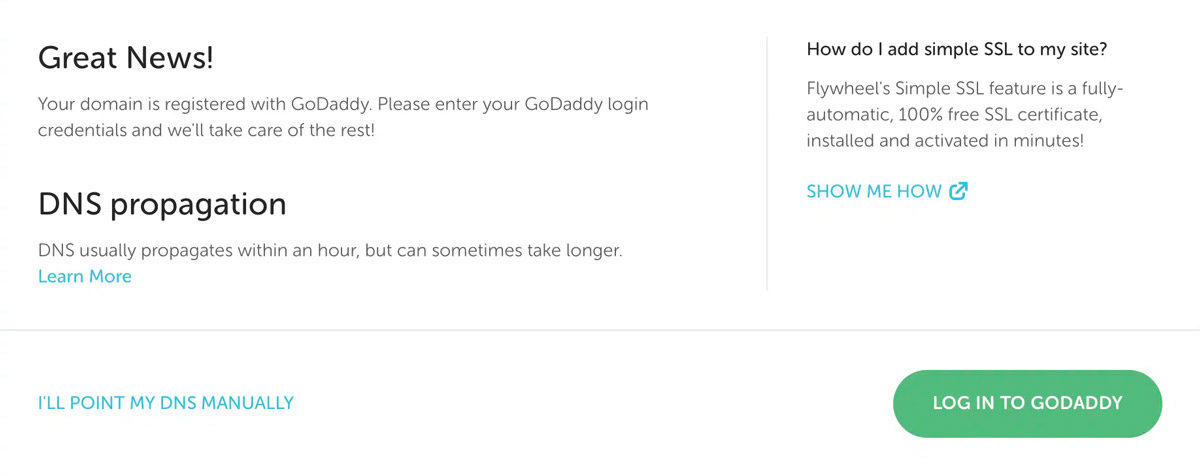
Some providers like GoDaddy and Cloudflare allow you to login and connect the registered URL automatically. Since Tailfin-managed URLs are registered with GoDaddy, setup is easy and requires just a flew Flywheel clicks.
DNS records can also be pointed manually. Flywheel provides specific directions for changing DNS settings by provider. Use these settings in the provider’s DNS Settings for both the root domain and the www version of that domain.
| Domain | DNS Record Type | Value |
| example.com or @ | A record | Your Flywheel site IP address |
| www.example.com or www | CNAME record | example.com |
Installing Divi #
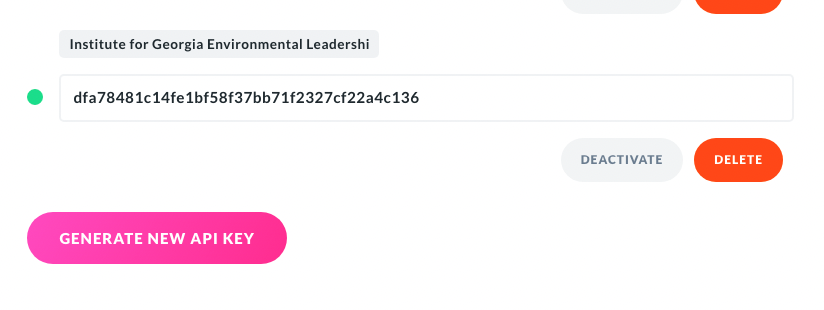
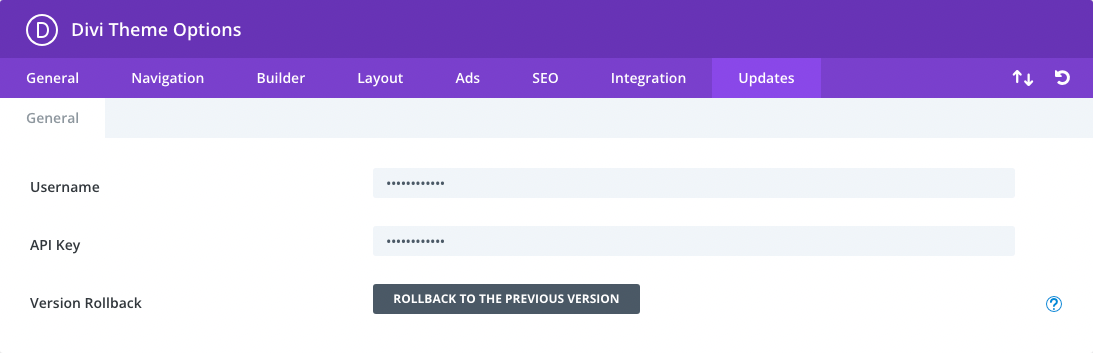
Flywheel should give an option to set up Divi along with the wordpress installation, or the Divi theme can be installed manually. To manually install Divi, download the theme .zip file from Elegant Themes and be sure to generate an API key for each new website. The API key should then be added to the wordpress backend of Divi under Divi > Theme Options > Updates. Using the correct API key ensures the site continues to receive Divi updates and support.
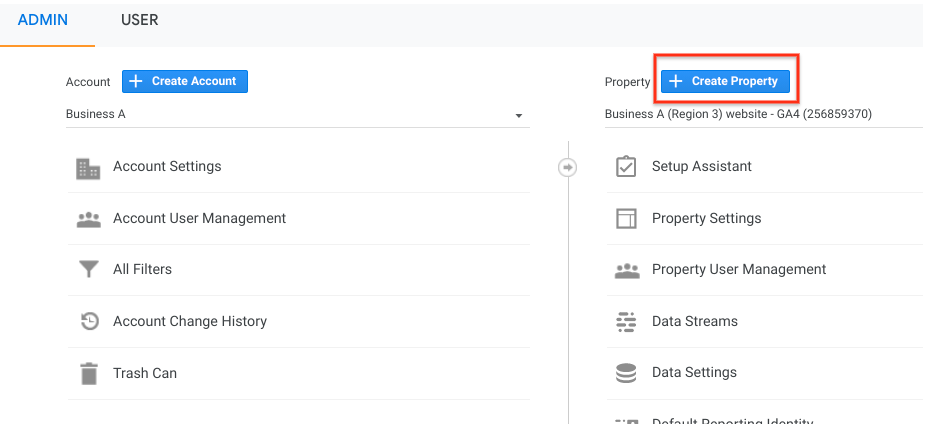
Setting Up Google Analytics #
Sign into the Tailfin Analytics Google account. In Admin, create an Account and give it a name related to your client. Select the appropriate settings and hit Next. Now, create the analytics property and give it a name related to the website. Click Next. Select your industry category and business size, then click Create.